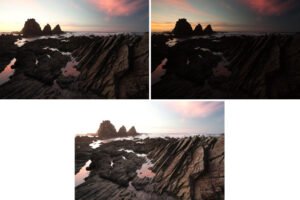
Multiple exposure blending is a powerful technique that allows photographers to combine several images into one, creating a composite that captures a broader dynamic range and greater detail than a single shot ever could. This method, also known as high dynamic range (HDR) photography, is particularly useful in challenging lighting conditions and can produce breathtaking results when done correctly. Whether you are a seasoned professional or an enthusiastic amateur, understanding and mastering multiple exposure blending can elevate your photography to new heights.
Understanding Multiple Exposure Blending
At its core, multiple exposure blending involves taking multiple photographs of the same scene at different exposure levels and then merging them to create a single, well-balanced image. Each exposure captures different details in the shadows, midtones, and highlights, which are then blended to produce an image with a wider dynamic range than a single exposure can achieve.
Key Benefits:
- Enhanced Dynamic Range: Capture details in both the darkest shadows and the brightest highlights, which would otherwise be lost.
- Increased Detail and Texture: Combining multiple exposures reveals finer details and textures in the scene.
- Creative Flexibility: Allows for creative interpretation and artistic expression by selectively blending exposures.
The Process of Multiple Exposure Blending
- Capturing the Images:
- Tripod Use: Ensure your camera remains stationary by using a tripod. This is crucial for aligning multiple exposures.
- Bracketing: Use your camera’s bracketing function to take multiple shots at different exposure levels. Common practice is to capture three to seven exposures, ranging from underexposed to overexposed.
- Manual Adjustments: For more control, manually adjust the exposure settings, such as shutter speed, aperture, and ISO.
- Preparing the Images:
- RAW Format: Shoot in RAW to retain maximum detail and flexibility in post-processing.
- Consistent Settings: Maintain consistent white balance and focus settings across all exposures to ensure seamless blending.
- Blending the Exposures:
- Software Selection: Use specialized software like Adobe Photoshop, Lightroom, or dedicated HDR programs such as Photomatix Pro or Aurora HDR.
- Alignment: Align the images to correct any minor shifts or movements that occurred during shooting.
- Deghosting: Address any moving elements within the scene to avoid ghosting artifacts.
- Tone Mapping: Adjust the tone mapping settings to balance the exposure and achieve the desired look.
Techniques for Effective Blending
Manual Blending:
- Layer Masks: In Photoshop, use layer masks to manually blend different parts of each exposure, allowing for precise control over which areas of each image are used.
- Brush Tools: Use brush tools to paint in details from different exposures, enhancing specific areas of the image.
Automatic HDR Software:
- Preset Selection: Many HDR programs offer presets that can serve as a starting point for your blending process.
- Fine-Tuning: Adjust sliders for exposure, contrast, saturation, and other parameters to fine-tune the final image.
Exposure Fusion:
- Natural Look: This technique blends exposures without excessive tone mapping, resulting in a more natural and realistic look.
- Blending Algorithms: Use software that supports exposure fusion, such as Lightroom’s HDR Merge or Enfuse, to achieve this effect.
Tips for Stunning Results
- Avoid Overprocessing: It’s easy to get carried away with HDR effects, but subtlety often yields more pleasing results. Aim for a natural look that enhances the scene without making it appear artificial.
- Mind the Highlights: Be careful not to blow out highlights or lose details in the brightest parts of the image. Adjust the tone mapping settings to preserve highlight detail.
- Control the Shadows: Ensure that shadow areas retain enough detail and depth. Avoid overly brightening shadows, which can result in a flat and unnatural look.
- Use Quality Filters: Neutral density (ND) filters and graduated ND filters can help balance the exposure across the scene, reducing the need for extreme adjustments in post-processing.
- Experiment and Practice: Mastering multiple exposure blending takes time and experimentation. Try different settings, techniques, and software to find what works best for your style and subject matter.
Conclusion
Multiple exposure blending is a transformative technique in photography that allows you to capture and showcase the full dynamic range of a scene. By combining several exposures, you can produce images that are rich in detail, texture, and tonal range, creating stunning photographs that stand out. With careful planning, precise execution, and thoughtful post-processing, you can harness the power of multiple exposure blending to elevate your photographic artistry. Whether you are shooting landscapes, cityscapes, or interiors, this technique opens up a world of creative possibilities that are limited only by your imagination.


