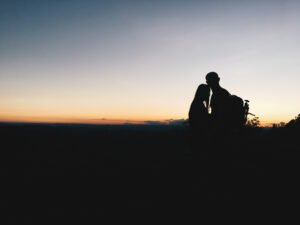
Photography has always been the art of capturing light. As the day transitions into night, the world is bathed in a unique, ethereal glow that photographers find irresistible. However, capturing the perfect dusk scene in real-time can be challenging due to rapidly changing light conditions and limited shooting windows. Enter day-to-dusk photo editing, a powerful technique that allows photographers to transform ordinary daytime photos into stunning twilight masterpieces. This blog delves into the magic of day-to-dusk photo editing, its significance, and step-by-step guidance on how to achieve breathtaking results.
The Magic of Day to Dusk Editing
Day-to-dusk photo editing is a transformative process that involves altering a photograph taken in daylight to give it the appearance of having been shot during the golden hours of dusk. This technique is not just about darkening the image; it involves a meticulous adjustment of light, color, and shadows to recreate the warm, serene ambiance of the early evening.
The appeal of dusk photos lies in their dramatic lighting and the emotional response they evoke. The soft, warm hues of the setting sun combined with the cool tones of the impending night create a visually captivating contrast that can turn a mundane scene into a visually stunning composition. Day-to-dusk editing enables photographers to harness this aesthetic without being constrained by time or weather conditions.
Why Use Day to Dusk Photo Editing?
- Flexibility and Convenience: Photographers can capture images at any time of the day and still create the desired dusk effect, eliminating the need to wait for the perfect light conditions.
- Enhanced Visual Appeal: The transformation can make real estate photos more attractive, marketing materials more compelling, and personal projects more visually interesting.
- Creative Control: Editing allows for greater artistic expression, as photographers can manipulate various elements to match their creative vision.
Tools and Software for Day-to-Dusk Editing
Several photo editing software options offer tools for day-to-dusk transformations. Some of the most popular include:
- Adobe Photoshop: Known for its comprehensive suite of editing tools, Photoshop is a favorite among professionals for day-to-day editing.
- Lightroom: Ideal for batch processing and global adjustments, Lightroom is another excellent choice for creating dusk effects.
- Luminar AI: With AI-driven tools, Luminar AI simplifies the process, making it accessible even for beginners.
Step-by-Step Guide to Day to Dusk Editing
1. Choosing the Right Photo
Not all daytime photos are suitable for dusk transformation. Look for images with interesting compositions, clear skies, and distinct architectural or natural elements that can be enhanced by dusk lighting.
2. Basic Adjustments
Start with basic adjustments to correct exposure, contrast, and color balance. This provides a clean slate for more detailed editing.
- Exposure: Reduce overall exposure slightly to simulate the dimming light of dusk.
- Contrast: Increase contrast to add depth and detail.
- White Balance: Shift the white balance towards warmer tones to mimic the golden hour glow.
3. Sky Replacement
A crucial step in day-to-dusk editing is replacing the daytime sky with a dusk or twilight sky. Tools like Photoshop’s Sky Replacement feature can automate this process.
- Select the Sky: Use selection tools to isolate the sky area.
- Replace with Dusk Sky: Import and blend a dusk sky image, adjusting its position and scale as necessary.
- Refine Edges: Smoothen and refine the edges to ensure a natural blend.
4. Lighting and Shadows
Adjust lighting and shadows to match the new sky and create a cohesive look.
- Dodge and Burn: Use dodge (lighten) and burn (darken) tools to enhance highlights and shadows.
- Gradient Maps: Apply gradient maps to simulate the gradual light falloff from the horizon.
- Light Sources: Add or enhance artificial light sources such as streetlights or building lights to create a realistic dusk ambiance.
5. Color Grading
Color grading involves adjusting the overall color palette of the image to achieve the desired mood.
- Hue/Saturation: Tweak the hue and saturation of specific color ranges to enhance the warm and cool tones.
- Color Lookup Tables (LUTs): Apply LUTs designed for dusk effects to streamline the grading process.
6. Final Touches
Polish the image with final adjustments to ensure a cohesive and professional look.
- Vignetting: Add a subtle vignette to draw attention to the center of the image.
- Sharpening: Enhance details with selective sharpening.
- Noise Reduction: Apply noise reduction to smooth out any grain introduced during the editing process.
Conclusion
Day-to-dusk photo editing is a powerful technique that allows photographers to transform ordinary daytime photos into stunning dusk scenes. By mastering this process, photographers can unlock new creative possibilities, produce visually captivating images, and overcome the limitations imposed by natural lighting conditions. With the right tools and a methodical approach, anyone can achieve breathtaking day-to-dusk transformations that evoke the magic and serenity of twilight.


